User Documentation
| | (In this walk-through, we'll assume that you have a fresh install, in which case, no information will exist within the system as yet.) |
Log-In screenWhen you first enter the system, you should see the log in screen Note you should have created a user who can access the system as part of the installation. If you didn't, you should still be able to use the mysql root user, however, remember giving someone else your mysql root user password is a security risk! |  |
Websites listIn a freshly installed system, this list will be empty, so click on 'Add', to bring up the add website page.The add website page has seven items:
Click on 'Insert' to create the website definition. If you are using XDBCMS as GPL (free) software (see terms and conditions), you must display a 'built with XDBCMS' logo at the bottom of each page. Version 0.06 introduced a pull down list into the website definition where you can choose the style of logo. You can choose:
|  |
| | Tip if you are unsure, it is simplest to set the permissions on your new website directory, and the images sub-directory to be writable by everyone. It is unlikely that the output directory will be visible directly to the world wide web. If you are considering doing this, you need to seek assistance from your web administrator. |
Once created, you should be returned to the websites list. On the list, click on the name of the website you've just created (or edit if you want to change anything). You should be showing the pages list.
Before you start to add pages to your website, there are a few setup chores to perform...
Look toward the top of the web page, and you should see a pull-down menu bar, move your mouse over the 'Website details' menu, to pull down a list of options.
Page Templates and Blocks
What is a 'page template'?
Page templates allow complete control over page layout - a website can have multiple page templates, and when you define a web page, you need to specify a page template to use.
When you create a page template, you use the WYSIWYG editor to define the page layout, which can contain any HTML - e.g. tables, graphics, text etc. Markers are placed within the page layout to show the system where to position page text, blocks (see below) and menus etc. The markers are entered as normal text keywords and braced by double sequare brackets i.e. [ and ]].
The keywords are:
| [BLOCK:BlockName]] | Insert the block named 'BlockName' |
| [MENU]] | Insert a standard menu |
| [PAGETEXT]] | Insert the text from the page definition. |
For example, a page template could be:
| [BLOCK:SideBar]] |
For a full list of keywords, see the keywords page within the menu.
(note the tables have been set to border 1 for demonstration purposes).
MENU Options
Please note that all files mentioned here appear within the 'blank_website' directory of the xdbcms installation.
MENU Options
Please note that all files mentioned here appear within the 'blank_website' directory of the xdbcms installation.
MENU
This is a standard menu style, made up of html tables, using specialised graphics. This menu style can be posted to any server or client.
MENU:TRANSPARENT
This is a more advanced menu style, it uses cascading style sheets to provide an indented menu style, that is semi-transparent. No graphics files are required for the menu directly, but best effects are from using the transparent menu over the top of a single large graphic. Some older web browsers do not support transparency, so the menu may appear to be a solid block.
If you update an already existing xdbcms generated website, you will need to re-copy the file 'stylesheet.css' from the standard files provided with xdbcms.
MENU:TREE
This uses the javascript tree facility used within the xdbcms application to provide a tree based menu. Most browsers should be capable of ruining the tree menu, however, if the browser does not, the javascript degrades to show all menu items.
In order to use the TREE option, the javascript file 'dtree.js' must exist within a sub-directory called 'scripts'. Also, a number of graphics files must exist within the 'images' directory. ('base.gif', 'folderopen.gif', 'folder_html.gif', 'folder.gif', 'nolines_plus.gif', 'nolines_minus.gif', 'line.gif', 'join.gif', 'joinbottom.gif', 'plusbottom.gif', 'plus.gif', 'minus.gif', 'minusbottom.gif').
MENU:TOP
This is a horizontal 'tab' based menu system. Multiple levels of tabs are supported, however, it is recommended that any given level has a 'small' number of menu entries, so that the menu is not wider than the browser window. Like the default 'MENU' option, the 'TOP' option is built using normal HTML tables and graphics and so is supported by just about every browser and server.
In order to use the 'TOP' option, certain graphic files need to exist within the 'images' directory: 'select.gif', 'rightselect.gif', 'rightdeselect.gif', 'leftselect.gif', 'leftdeselect.gif', 'deselect.gif'.
This is a standard menu style, made up of html tables, using specialised graphics. This menu style can be posted to any server or client.
MENU:TRANSPARENT
This is a more advanced menu style, it uses cascading style sheets to provide an indented menu style, that is semi-transparent. No graphics files are required for the menu directly, but best effects are from using the transparent menu over the top of a single large graphic. Some older web browsers do not support transparency, so the menu may appear to be a solid block.
If you update an already existing xdbcms generated website, you will need to re-copy the file 'stylesheet.css' from the standard files provided with xdbcms.
| Tip: It may be necessary to have a background image that only appears once (i.e. is not repeated for the length of the generated page as is used on this page). The only method for creating this at present is to view the html source of the page template. For example, a table definition may have a 'TD' option of: | style="background-repeat: no-repeat;"> the 'style' option is the key to making the background only repeat once. |
MENU:TREE
This uses the javascript tree facility used within the xdbcms application to provide a tree based menu. Most browsers should be capable of ruining the tree menu, however, if the browser does not, the javascript degrades to show all menu items.
In order to use the TREE option, the javascript file 'dtree.js' must exist within a sub-directory called 'scripts'. Also, a number of graphics files must exist within the 'images' directory. ('base.gif', 'folderopen.gif', 'folder_html.gif', 'folder.gif', 'nolines_plus.gif', 'nolines_minus.gif', 'line.gif', 'join.gif', 'joinbottom.gif', 'plusbottom.gif', 'plus.gif', 'minus.gif', 'minusbottom.gif').
MENU:TOP
This is a horizontal 'tab' based menu system. Multiple levels of tabs are supported, however, it is recommended that any given level has a 'small' number of menu entries, so that the menu is not wider than the browser window. Like the default 'MENU' option, the 'TOP' option is built using normal HTML tables and graphics and so is supported by just about every browser and server.
In order to use the 'TOP' option, certain graphic files need to exist within the 'images' directory: 'select.gif', 'rightselect.gif', 'rightdeselect.gif', 'leftselect.gif', 'leftdeselect.gif', 'deselect.gif'.
Blocks
A website can contain any number of blocks - a block is a standard piece of HTML text - i.e. can contain tables, graphics and text and can appear at any position within a page template. A good example of use is that blocks replace the 'heading' and 'footer' functions of older versions of XDBCMS.
In the above example, three blocks were created, called 'StandardHeading', 'StandardFooter' and 'SideBar'. (Any name could have been used - note the block names mentioned within the page template need to be exactly the same, including case)
Blocks are defined within the 'Website Details' pull down menu, in the 'Blocks' page. A block has a unique name, and standard text (defined using the WYSIWYG editor).
(Note: blocks are currently static text, in later revisions of this software, blocks may have extended functatiality).
Upload file categories
Go back to the 'Website details' menu, and select the 'Upload file categories' option to set up categories of file uploads (note you must define at least one category). These categories are used when uploading files - so that you can browse particular categories rather than examining an entire list of graphics to add to your pages.
Now that you have performed the basic housekeeping, you can either select 'upload files' or 'Page list' from the website details menu.
Uploading files.
A website tends to use a lot of graphic files. The 'upload files' option on the website details menu allows you to upload your graphics files into the website ready for use within your pages.
 Note xdbcms does not have facilities to upload your generated web pages to a world wide web webserver - to do this I recommend the excellent 'sitecopy' facility.
Editing pages
 Selecting 'Page list' from the website details screen shows a standard list of pages, where you can click on the name, 'edit' or 'add'. Edit and Add bring up the page editor. A page has a file name, a short description (to appear in the side menu in the generated website) a description, who maintains the page, and the pages 'parent'.
You can build a 'tree' hierarchy by nominating a parent page for each page within the system or 'Top Level Page' if the page should always appear.
You are able to edit a page using a WYSIWYG (what you see is what you get) editor.
Once you have edited your page and saved it, you can click on 'Preview' to get a preview of the finished page. If you are happy with the page, you can click on the 'Page generate' on the editor screen to generate that individual page, or the main generate pages option to generate all pages within the website (see below).
 As you add pages to your website, you should see these appear in the in the 'tree structure' in the left hand menu bar.
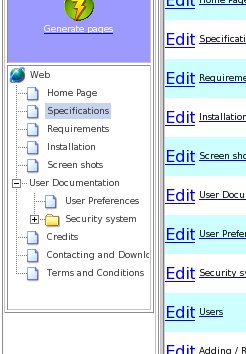
You can click to expand or contract the tree structure in the same manner as many file explorers (by clicking on the (+) and (-). Clicking on an individual page allows you to view the contents of that page.
Generating Your Website
Once you have entered all your details, select 'Generate' from the sidebar menu to go to the website generator.
Initially, you are prompted to identify which website to generate, click on the relevant website name from the list. After a few seconds, you'll see a number of messages appearing - check these for error messages - the most common is that XDBCMS cannot write to a file. Generally this problem is to do with file and directory permissions.
You should be able to open a browser and look at your new website. If you are missing text (e.g. there is no side-bar to the left of the page, this means you are either missing the relevant graphics files - see the 'blank-website' directory for the list of files, or file permissions are incorrect on these files and the directories.
Last Updated: November 9, 2006, 9:30 pm
Built using XDBCMS